

Wisniowski are one of Europes leading sectional garage door, front door, side hinged door, personnel door and high quality fencing manufacturers.
Now distributing in the UK in 2022, they offer high quality and excellent value for money. With a U-value on the fitted sectional door of approx 1.2 Wm2K, it is the most insulated 40mm thick door on the UK market.
All doors are made to measure. Designed to be installed onto the rear of a standard opening, the ordering size is simply the width and height of the aperture into which the door is to be installed.
We recently fitted a large Wisniowski sectional door in Ruabon and these are the step by step instructions for installation
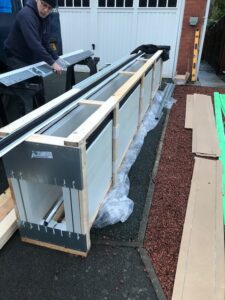
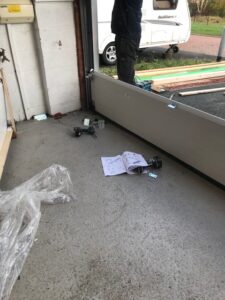
Step 1. Remove frame and gear from the crate.
All items that make up the entire door (except for the motor kit) come in one large crate.
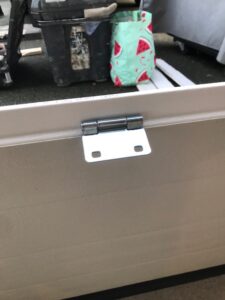
Step 2. Fit cover profiles to the legs
Lying on trestles, the sturdy galvanised frame legs are covered with the white frame leg cover profiles. These can be any colour – to match the colour of the door. The profiles are held in place by pinching them under the steel plates shown. They neatly cover the galvanised frame and are required if any of the frame legs are visible from outside
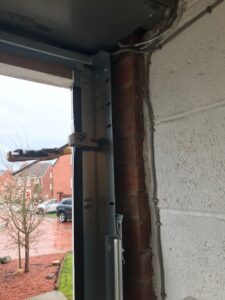
Step 3. Install frame leg uprights
The frame leg uprights are fitted behind the brick piers. In this case, the door and frame are being installed onto the rear of a timber frame due to the very deep lintel
Step 4. Fit the bracing bar. The distance between the frame legs is easily set to the correct dimension by temporarily bolting the bracing bar in place as shown. This bracing bar sets the correct distance and is later used between the rear of the tracks.
Step 5. Fit the horizontal tracks
The twin horizontal tracks and the curved quarter track are fitted to the frame leg uprights with flat headed bolts and nuts.
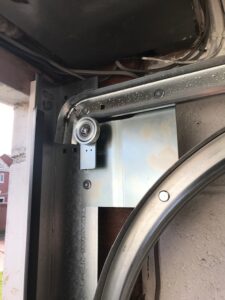
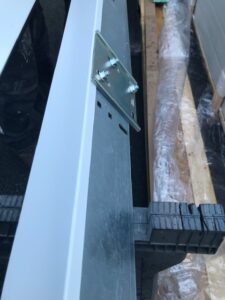
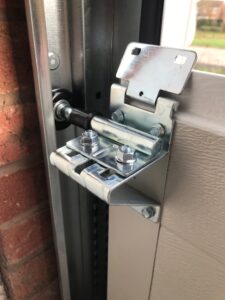
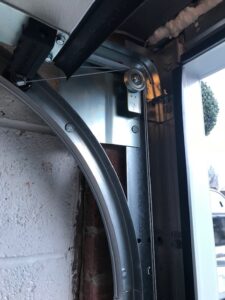
Step 6. Fit the cord pulling assembly pulley
This sturdy steel plate comes with the steel pulley (not plastic like other makes) ready fitted. The plate is bolted in 3 places…to the upright, the top track and the curved track, holding everything firmly in place.
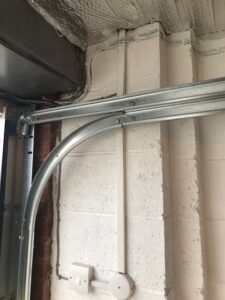
Step 7. Fit the rear bracing bar in place.
Once the legs are secured at the correct distance apart with the aid of the bracing bar, the bracing bar is removed and fitted between the rear of the tracks. Note the temporary stand holding the track in place to make working easier. On this particular installaton approx 150mm had to be cut off the horizontal tracks to allow the inward opening personel door to swing into the garage without obstruction.
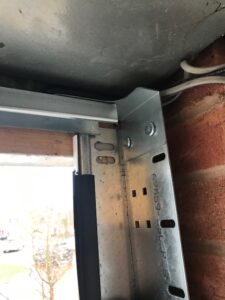
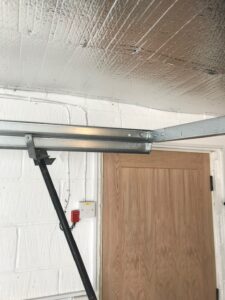
| Step 8. Fit the frame Crossbar
The front crossbar is fitted between the top of the frame by uprights. This has an in built rubber seal that the top door section goes against when the door is fully closed. A colour matched crossbar cover is available if any of the crossbar is going to be on view.
|

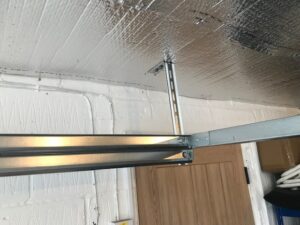
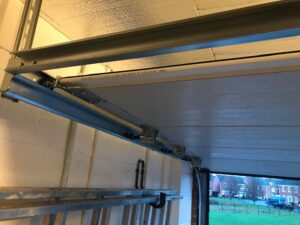
Step 9. Fit the intermediate and rear supports
Rear and intermediate track supports are fitted. On this particular installation a piece of punched angle has been used on the intermediate one, fixed to the ceiling via punched angle that was already in place from the previous door. The rear track support is the standard Wisniowski support.
Step 10. Close up of the rear track support
The rear track support is securely fixed to the ceiling joists as this tasks a lot of weight when the door is in the open position.
Step 11. Offer the bottom panel into place. The bottom panel is offered into place and the spindle/hinge brackets are quickly fixed with hex head self tappers into the factory pre drilled holes.
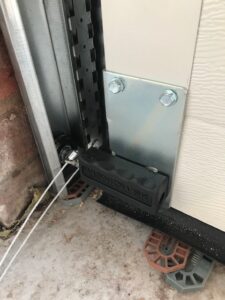
Step 12. Fix Bottom Roller Brackets. The bottom roller bracket, roller and spindle also hold the bottom of the twin lift cables. The door is lifted upwards at this point. Twin cables ensure against a single cable break.
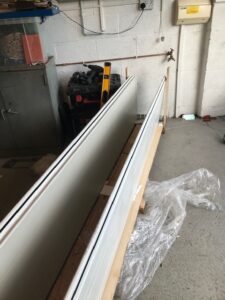
Step 13. Pull the cellophane off the other panels. Sections 2, 3, and 4 stay safely in the crate. As the panels are lifted out of the crate, the transit cellophane that is on the front of each panel is removed.
Step 14. Bottom Panel in Place.
Step 15. Close up of the intermediate hinge plate

Step 16. Peel off the protective cellophane from the front of the remaining sections.
Step 17. Offer in the other panels. The subsequent sections are offered into place with a card packer between the sections to create the correct clearance but still allowing the intermediate (between the panels) rubber seals to keep out the droughts.
Step 18. Door is opened and the lift cables are threaded over the top pulley.
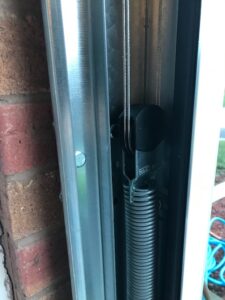
Step 19. The other end of the lift cables are threaded around the spring pulley and anchored into place.

Step 20. Bottom of the springs are anchored to the bottom spring anchor plate. Note the numerous positions to get the perfect door balance.
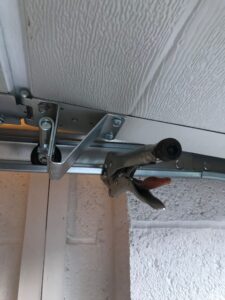
Step 21. Whilst the cables are being threaded into place the door is held safely open with a pair of mole grips. These prevent the door rolling forward in the tracks and slamming shut before the cables are attached.
Step 22. Door open with cables and springs attached. Note that the top roller runs in the top track and all the other rollers run in the bottom track
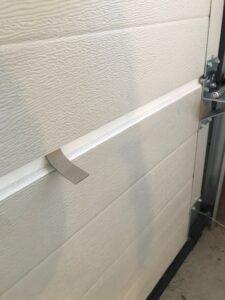
Step 23. UPVC and silicone sealing. The timber frame behind which the door has been installed has been overcladded with white UPVC and neatly silicone sealed.
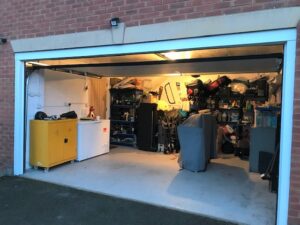
Step 24. Wisniowski Sectional Door in the part open position
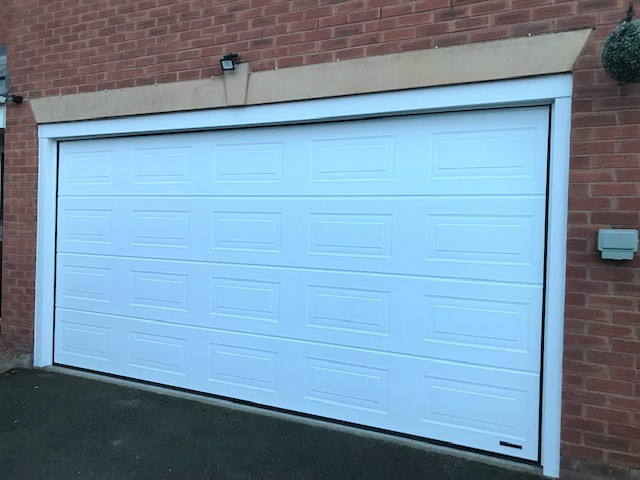
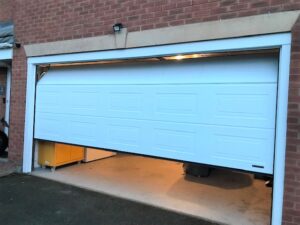
Step 26. Finished Wisniowski sectional door in the closed position